No products in the cart.
")


Roll over image to zoom in
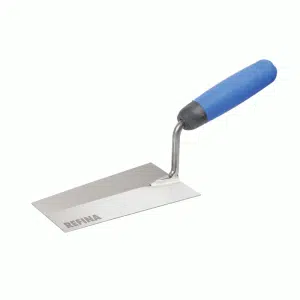
Refina H Shaped Plastering Darby Plastering Straight Edge Feather Edge
£18.00 INC. VAT
- 🟢 Harnesses precision aluminium extrusions for optimal performance.
- 🟢 Unique H-section design ensures flawless application and finish.
- 🟢 Bevelled lip feature enables efficient removal of high spots.
- 🟢 Multiple size options to fit every rendering and plastering need.
- 🟢 The perfect tool to identify hollows and high spots before sponging and trowelling up.
Available Options
 | 252610 | 1 Meter | £18.00 INC. VAT | ||
| 252612 | 1.2 meter | £22.00 INC. VAT | ||
| 253515 | 1.5 meter | £26.00 INC. VAT | ||
| 252617 | 1.75 meter | £31.00 INC. VAT | ||
| 253520 | 2.0 meter | £35.00 INC. VAT | ||
| 253525 | 2.5 meter | £43.00 INC. VAT |
Refina H Shaped Plastering Darby
Refina H Shaped Plastering Darby: The Ultimate Tool for Every Plastering and Rendering Task
Stepping up your plastering and rendering game is easier than ever with the Refina H Shaped Plastering Darby. This high-performing tool promises a flawless finish on all your plastering and rendering jobs, making it an absolute must-have for all professionals and DIY enthusiasts. Let’s delve into what makes this tool such a standout.
Precision-Crafted for Superior Performance
At the heart of the Refina H Shaped Plastering Darby is a commitment to superior performance. Each piece is crafted from precision aluminium extrusions, ensuring durability and reliability that’s hard to beat. This feather edge is built to withstand the rigors of heavy-duty work, making it a reliable ally in every project.
The bevelled lip is another noteworthy feature. It enables efficient removal of high spots, creating a seamless and even finish that’s sure to impress. The comfortable profile of the darby allows you to hold it at a slight angle to the wall, much like a trowel. By adjusting the angle, you can easily peel the high spots off the surface, resulting in an impeccably smooth finish.
Versatile Sizes for All Project Needs
What truly sets the Refina H Shaped Plastering Darby apart is its versatility. Available in multiple sizes ranging from 3’4×4.5″ to a whopping 8’2×4.5″, this tool is designed to adapt to your unique needs. Whether you’re working on a small repair job or tackling a large wall, there’s a perfect size for you. The diverse size range ensures that no matter the size of your project, you’ll always have the right tool at your disposal.
Unleash Superior Plastering and Rendering Results
The Refina H Shaped Plastering Darby is not just a tool, it’s your partner in achieving the best plastering and rendering results. It’s designed for finishing and levelling plaster and render, wall, and floor surfaces. This means you can count on it to help you achieve a smooth, flat finish every time.
Moreover, this H-shaped darby excels in identifying hollows and high spots before sponging and trowelling up. This ensures that your final surface is devoid of any imperfections, giving your work a professional touch.
Experience Modern Rendering and Plaster Systems
With the Refina H Shaped Plastering Darby, you’re not just buying a tool, you’re investing in a modern rendering and plaster system. It’s a critical component that makes your work easier, faster, and remarkably better. This tool has been recognized as essential in the application of projection plasters, a testament to its functionality and efficacy.
In conclusion, the Refina H Shaped Plastering Darby is a top-tier tool that combines precision, versatility, and durability, making it an excellent investment for anyone seeking to improve their plastering and rendering tasks. So why wait? Elevate your work to new heights of professionalism with the Refina H Shaped Plastering Darby today.
| Method | ||||
 |
Different people prefer different methods for using their feather edge. It is often recommended to flick small amounts of water on to the product before using the feather edge. The basics are pretty similar but there are different opinions on how the tool should be moved. Here is a basic method, but be aware that it takes a lot of practice and hard work to get it right. | |||
 |
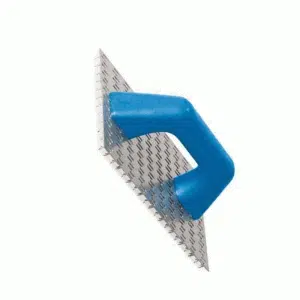
Step 1 – Grip feather edge hsection featheredge aluminiumThe thinner edge of the tool will be in contact with the surface to be smoothed, so grip around the thicker edge with both hands, at a comfortable distance apart. |
|||
 |
Step 2 – Place feather edgeThe feather edge is held horizontally or vertically at a very acute angle to the surface to be smoothed: around ten to twenty degrees. |
|||
 |
Step 3 – Move feather edgeSweep the feather edge in long motions across the surface with firm, even pressure. It is advised to make sweeps up or down and not diagonally for best results. |
|||
 |
Step 4 – RepeatBegin in the corners of a room or building and repeat sweeps across the surface until the whole area is smooth. |
Matthew topper –
Top class straight edge,nice and light gets the jobs done.
Gary Hughes (verified owner) –
Quality rule.
Sam H. (verified owner) –
Carl Griffiths (verified owner) –
Charlie W. (verified owner) –